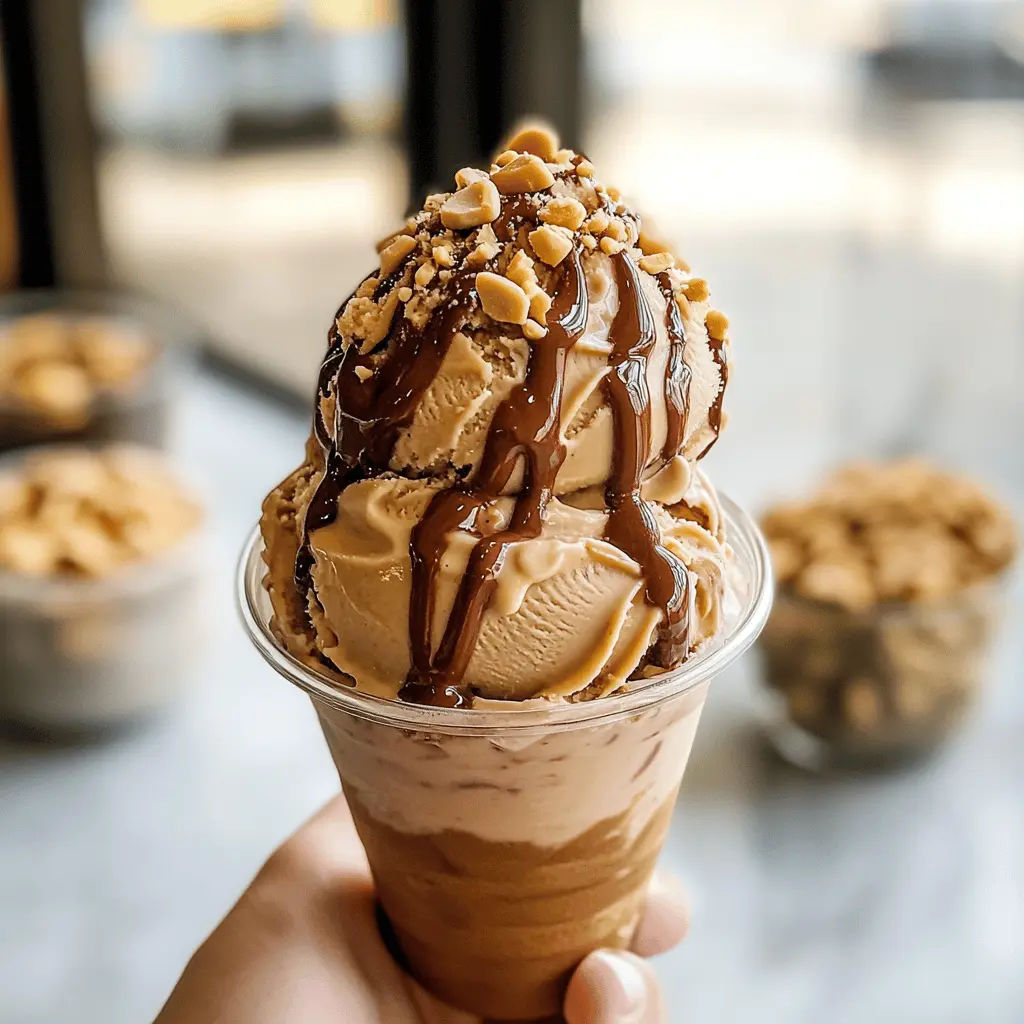
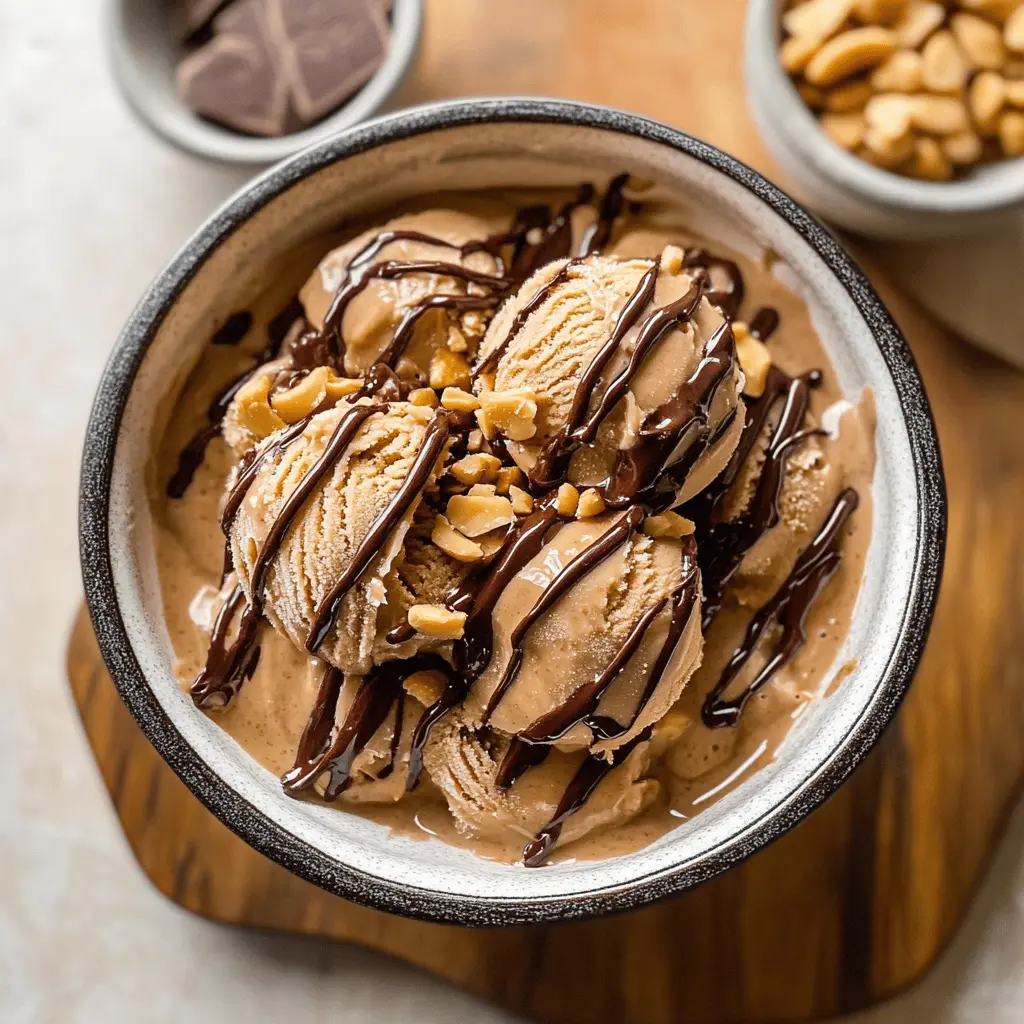
This fun ice cream recipe blends rich chocolate with creamy peanut butter. It’s so easy, you’ll want to make it every day! Just mix, freeze, and spin in your Ninja Creami!
You can’t go wrong with chocolate and peanut butter! Plus, it’s a great way to cool down on hot days. Trust me, your taste buds will be jumping for joy! 🍦
Key Ingredients & Substitutions
Whole Milk: This provides a creamy texture. If you’re looking for a lighter option, consider using 2% milk or almond milk. However, subbing with non-dairy might change the creaminess.
Heavy Cream: This keeps the ice cream rich. For a dairy-free option, coconut cream is a great alternative. It adds a delightful coconut taste too!
Granulated Sugar: Regular sugar works best here, but you can use coconut sugar or a sugar substitute like stevia if you’re cutting sugar.
Unsweetened Cocoa Powder: Use high-quality cocoa for richer taste. You can swap this with carob powder if you want a different flavor profile.
Creamy Peanut Butter: I love creamy peanut butter for smoothness, but crunchy gives a fun texture! You can use almond butter or any nut butter if you’re looking for something different.
How Do I Ensure the Ice Cream is Creamy and Not Ice Crystals?
The key to creamy ice cream lies in the blending and freezing process. Make sure your mixture is well combined to avoid ice crystals forming. Here are some tips:
- Mix the base thoroughly until smooth. Whisk out any lumps in the peanut butter and sugar.
- Freeze the mixture for a full 24 hours. It must be solid for the Ninja Creami to churn effectively.
- Always use the ice cream setting for the best texture when churning.
Taking these steps will help you enjoy a smooth and creamy ice cream every time!
Easy Ninja Creami Chocolate Peanut Butter Ice Cream
Ingredients You’ll Need:
- 1 1/2 cups whole milk
- 1 cup heavy cream
- 3/4 cup granulated sugar
- 1/2 cup unsweetened cocoa powder
- 1/2 teaspoon salt
- 1 teaspoon vanilla extract
- 1/2 cup creamy peanut butter (plus extra for drizzling)
- Optional: chocolate chips or peanut butter chips for mix-ins
How Much Time Will You Need?
This recipe takes about 15 minutes to prepare, but don’t forget to allow at least 24 hours for the mixture to freeze until completely solid. Once your ice cream is frozen, you’ll spend another 5–10 minutes processing it in the Ninja Creami. So you can expect a total time commitment of approximately 24 hours and 15 minutes, but the waiting is worth it!
Step-by-Step Instructions:
1. Whisk the Base
In a medium bowl, combine the whole milk, heavy cream, granulated sugar, unsweetened cocoa powder, and salt. Use a whisk to mix everything together until the sugar and cocoa powder are completely dissolved. You want a smooth mixture, so take your time!
2. Add Flavor
Add in the vanilla extract and creamy peanut butter. Whisk again until the peanut butter is fully incorporated and your mixture looks deliciously smooth. This is where the magic really begins!
3. Freeze It Up
Carefully pour the mixture into the Ninja Creami pint container, making sure to leave a little space at the top to allow for expansion. Seal the container tightly with the lid and place it upright in the freezer. Let it freeze for at least 24 hours, ensuring it’s completely solid.
4. Process in the Ninja Creami
After your mixture is frozen solid, it’s time to turn it into ice cream! Remove the lid and insert the pint into your Ninja Creami machine. Select the “Ice Cream” function and let it work its magic until your mixture is transformed into creamy ice cream.
5. Add Mix-Ins (Optional)
If you want to take your chocolate peanut butter ice cream to the next level, this is the time to add in any chocolate chips or peanut butter chips you desire. Use the “Mix-In” function to fold them gently into your ice cream.
6. Serve and Enjoy
Scoop your delicious homemade ice cream into bowls or cups. Don’t forget to drizzle some extra peanut butter on top for that added flavor! Serve immediately, and get ready to enjoy your creamy chocolate peanut butter bliss.
FAQ for Easy Ninja Creami Chocolate Peanut Butter Ice Cream
Can I Use a Different Type of Milk or Cream?
Absolutely! You can substitute whole milk with 2% milk or almond milk for a lighter option. For the heavy cream, coconut cream is a great dairy-free alternative that will still give you that creamy texture.
How Can I Make This Ice Cream Even Healthier?
If you’re looking to reduce sugar, try using a sugar substitute like stevia or monk fruit sweetener. You can also use natural nut butter without added sugars or oils for a healthier peanut butter option.
What Should I Do If My Ice Cream Is Too Hard After Freezing?
If your ice cream is too hard, remove it from the freezer and let it sit at room temperature for about 5-10 minutes before processing it in the Ninja Creami. This will make it easier for the machine to churn and create a smoother texture.
How Should I Store Leftovers?
Store any leftover ice cream in an airtight container in the freezer. It’s best enjoyed within 1-2 weeks for optimal flavor and texture, but it can last longer if properly stored.