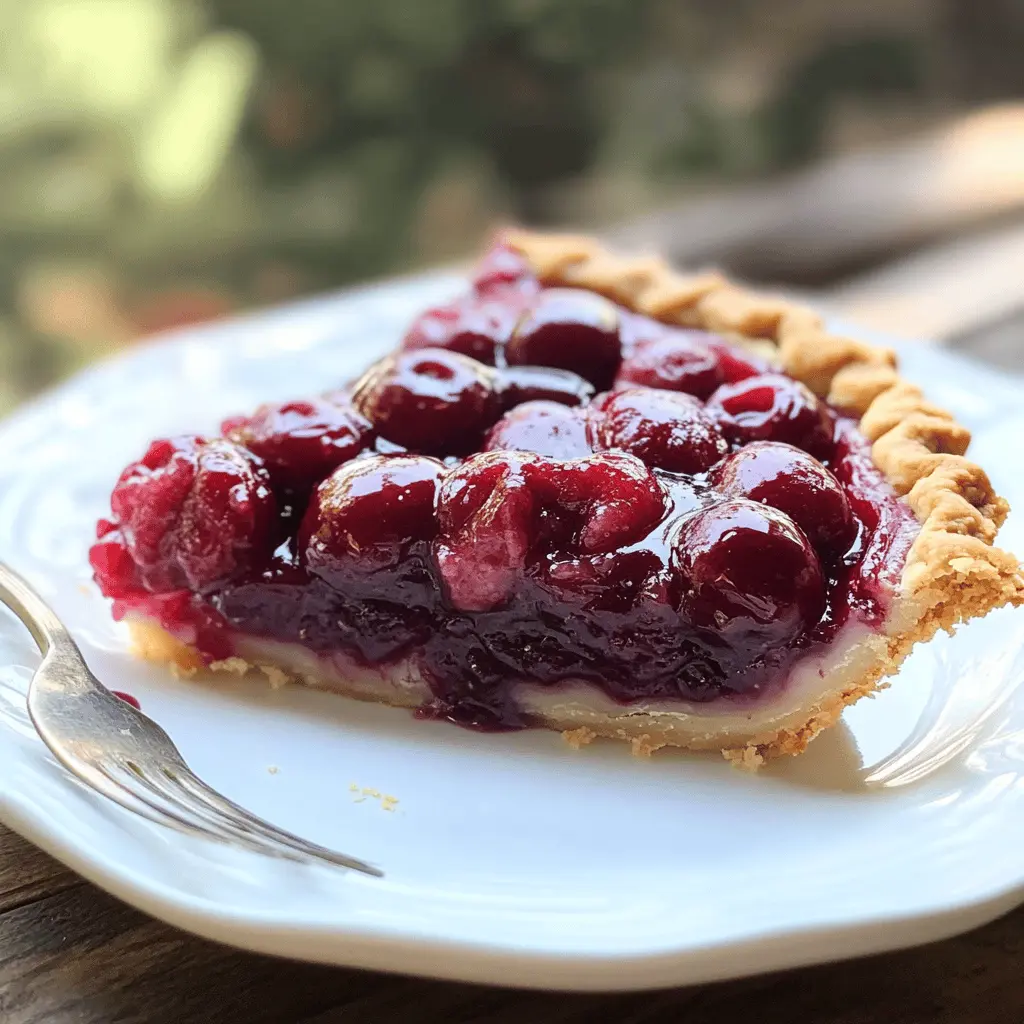
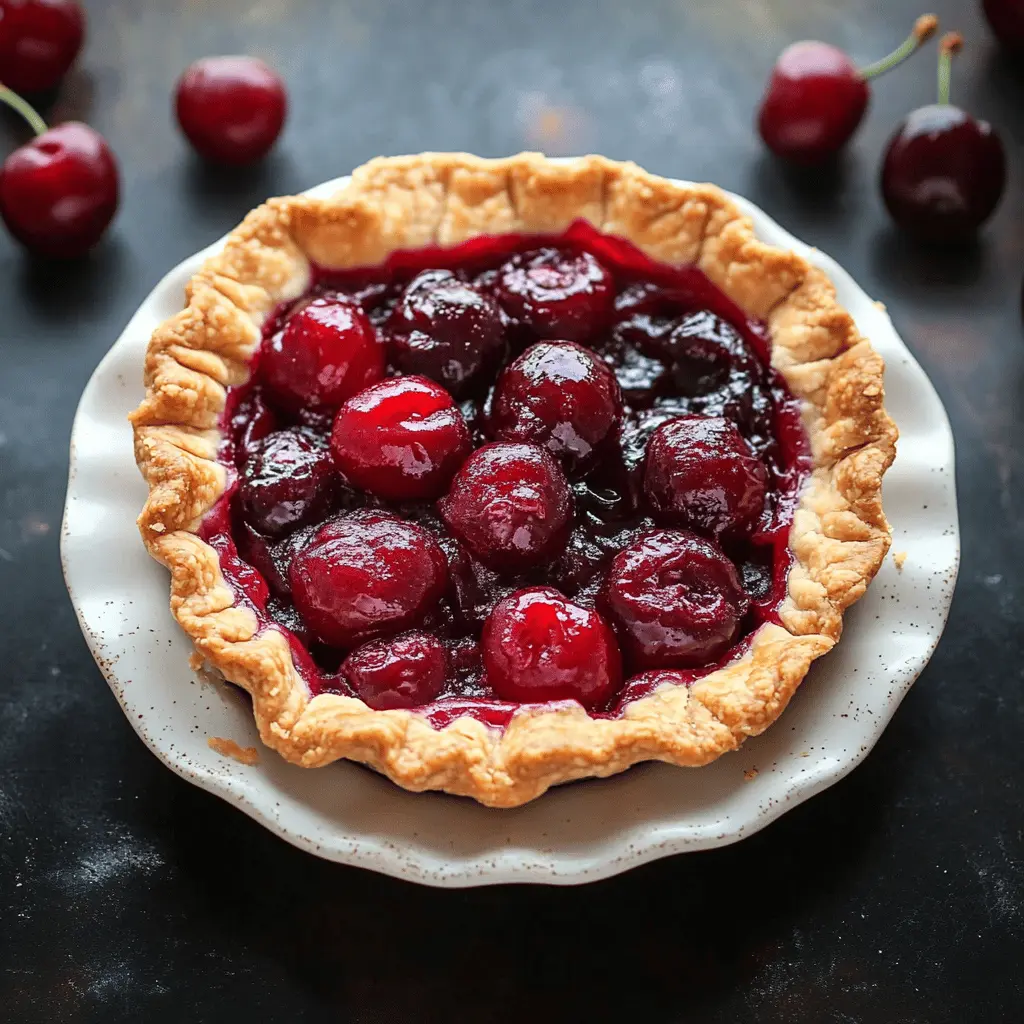
This Easy Homemade Cherry Pie is a sweet delight with juicy cherries and a flaky crust. It’s perfect for any occasion when you’re craving something fruity and fresh!
You’ll love how simple it is to whip up! Just toss the cherries with some sugar, pour them into the crust, and bake. Trust me, your kitchen will smell heavenly! 🍒
Key Ingredients & Substitutions
Pie Crust: Store-bought refrigerated pie crusts are super convenient, but homemade is always a winner for taste! If you’re gluten-free, try a gluten-free crust or a simple almond flour or oat crust.
Tart Cherries: Fresh tart cherries give the best flavor, but if they aren’t in season, frozen pitted cherries work just fine. Just make sure to thaw and drain them well to avoid a soggy pie.
Sugar: The amount of sugar can vary based on the sweetness of the cherries. If you’re looking for a lower sugar option, you can substitute with a sugar alternative like stevia or monk fruit sweeteners, but keep in mind that it may slightly change the taste.
Almond Extract: This is optional but enhances the cherry flavor. If you don’t have it, vanilla extract is a great substitute to add a different flavor note.
How Do I Make Sure My Cherry Pie Filling is Perfectly Thick?
The key to a great cherry pie filling is the right amount of cornstarch. This thickens the juices released by the cherries during baking. Follow these steps:
- Mix the cherries with sugar, cornstarch, and lemon juice. Let them sit for about 10 minutes. This helps release the juices.
- If your filling looks too watery after sitting, you can add a bit more cornstarch, but do this carefully to avoid over-thickening.
- Dotting the filling with butter before covering it with a crust adds richness and can help with thickening as it bakes.
Letting the pie cool completely before slicing will also help it set, giving you nice clean slices!
Best Easy Homemade Cherry Pie
Ingredients:
- 1 package (2 crusts) refrigerated pie crusts or homemade pie crust for a double crust pie
- 4 cups fresh or frozen pitted tart cherries (if using frozen, thaw and drain well)
- 1 to 1 1/4 cups granulated sugar (adjust depending on sweetness of cherries)
- 1/4 cup cornstarch
- 1/4 teaspoon almond extract (optional, enhances cherry flavor)
- 1 tablespoon fresh lemon juice
- 1/4 teaspoon salt
- 1 tablespoon unsalted butter, cut into small pieces
- 1 egg, beaten (for egg wash)
- Sugar for sprinkling on crust
How Much Time Will You Need?
This delicious cherry pie takes about 15 minutes to prep and approximately 1 hour for baking. After baking, let it cool for about an hour to set before slicing. In total, you’ll be looking at about 2 hours from start to finish, but trust me, the wait is worth it!
Step-by-Step Instructions:
1. Prepping the Oven and Crust:
First, preheat your oven to 425°F (220°C). Meanwhile, take one pie crust and place it into a 9-inch pie dish. Make sure to gently press it to fit the bottom and sides of the dish. It should hang over a bit, which is perfect!
2. Mixing the Cherry Filling:
In a large mixing bowl, combine the cherries, granulated sugar (start with 1 cup and adjust if necessary), cornstarch, almond extract (if you’re using it), lemon juice, and salt. Toss everything well until the cherries are nicely coated. Let the mixture sit for a few minutes so it can release some delicious juices.
3. Assembling the Pie:
After the cherry mixture has rested, pour it carefully into your prepared pie crust. Dot the top of the filling with small pieces of butter for extra richness. Now it’s time to cover it up! You can either place the second pie crust over the top whole, or get creative and make a pretty lattice design—just remember to cut some openings if you cover it whole to let steam escape.
4. Sealing the Edges:
Trim any excess dough from the edges of the pie crust. You can crimp or flute the edges to seal it up nicely. This not only looks good but also prevents the filling from leaking out!
5. Preparing for Baking:
Brush the top of the pie with the beaten egg to give it a lovely golden color while baking. Then, sprinkle a bit of sugar on top for added sweetness and a nice finish. Now, place your pie on a baking sheet to catch any drips during baking.
6. Baking the Pie:
Start by baking the pie in your preheated oven for 15 minutes at 425°F (220°C). After that, reduce the temperature to 350°F (175°C) and continue baking for another 35-40 minutes. You’ll want to keep an eye on it; once the crust is golden brown and you see the filling bubbling, it’s done!
7. Cooling Down:
Once baked, remove the pie from the oven and let it cool completely on a wire rack. This step is important to allow the filling to set nicely, so resist the urge to slice right away!
8. Serving Your Cherry Pie:
When you’re finally ready to serve, slice the pie and enjoy it warm or at room temperature, topped with a scoop of vanilla ice cream or a dollop of whipped cream. Enjoy every bite of your delicious homemade cherry pie!
Happy baking! 🍒
Frequently Asked Questions (FAQ)
Can I Use Different Types of Cherries?
Yes! While tart cherries are traditional for cherry pie, you can use sweet cherries if you prefer a sweeter flavor. Just keep in mind that you may need to adjust the sugar amount depending on how sweet the cherries are.
How Do I Store Leftover Cherry Pie?
Leftover cherry pie can be stored at room temperature for up to 2 days. If you want to keep it longer, cover it with plastic wrap or foil and refrigerate for up to 5 days. To reheat, warm individual slices in the microwave or enjoy it cold!
Can I Freeze Cherry Pie?
Absolutely! Cherry pie freezes well. Make sure it’s completely cooled, then wrap it tightly in plastic wrap and aluminum foil. You can freeze it for up to 3 months. To eat, thaw overnight in the fridge before reheating in the oven.
What Can I Substitute for Cornstarch?
If you don’t have cornstarch, you can substitute it with an equal amount of all-purpose flour or tapioca starch. Keep in mind that flour may create a slightly different texture, but it will still work for thickening the filling.